
piątek, 25 września 2015
Gotham Billboards
niedziela, 20 września 2015
Tutorial: Painting Brick Walls
Recently I've painted a model of The Monarch Theatre for the Multiverse Gaming webstore showcase, and decided to share with you a method I use for painting old brick on lasercut buildings. While it is very simple to get the brick texture on some other materials (plasticard, decorflex etc.), laser-engraved brickwork may seem a bit more challenging, as the depth of the recesses between the bricks is really small compared to other materials. While I've seen some great looking lasercut brick buildings (big shout-out to Jack Glanfield and his winter Gotham table here!), many people seem to either leave their models bare or paint them with a single shade of red/pink/orange. Hopefully after reading this step-by-step tutorial you will find it much easier to get that old brickwork look on your MDF or HDF buildings!
Materials and Tools
- sponge (blister foam works perfectly)
- wide flat brush
- airbrush (optional)
Paints
- grey acrylic primer
- VMC 137 Cavalry Brown
- VMC 135 Beige Brown
- VMC 027 Orange Red
- Army Painter Strong Tone
- Vallejo Game Color Wash: Pale Grey
Click on the pictures to see the bigger version.
1. Priming
2. Stippling
3. Rubbing
Get all three paints you have used until now ready. You will switch between each of them several times for the next step.
Leave very small amount of paint on the sponge (almost like for a drybrushing) and rub it on the wall with the sponge:
4. Washing
Now we will bring out that brick texture with a bit of wash. Take a wide flat brush and use it to get some Game Color Pale Grey wash on the wall:
Tip: if you feel there's too much wash left on the surface of the wall, just rub it further into the recesses with your finger, clean your brush and go back to washing the walls as before.
5. Shading
Finished!


Materials and Tools
- sponge (blister foam works perfectly)
- wide flat brush
- airbrush (optional)
Paints
- grey acrylic primer
- VMC 137 Cavalry Brown
- VMC 135 Beige Brown
- VMC 027 Orange Red
- Army Painter Strong Tone
- Vallejo Game Color Wash: Pale Grey
1. Priming
 |
| Spray paint your model with a grey acrylic spray. Try to be thorough, but don't worry if there's some bare MDF/HDF showing. |
 |
| Tear a small bit of blister foam, get some VMC Cavalry Brown on it and start stippling - you need just a tiny amount of paint to be on the sponge. Cover a better part of each wall, so it looks roughly like this: |
 |
| The whole building after the first layer of stippling. |
 |
| Repeat the stippling with Beige Brown, trying to fill up the grey areas with color. |
 |
| Fill up the grey areas further with VMC Orange Red. |
Get all three paints you have used until now ready. You will switch between each of them several times for the next step.
Leave very small amount of paint on the sponge (almost like for a drybrushing) and rub it on the wall with the sponge:
 |
| Just smear it across the bricks. |
Now we will bring out that brick texture with a bit of wash. Take a wide flat brush and use it to get some Game Color Pale Grey wash on the wall:
 |
| Move the brush from the top to the bottom first (to get the wash into the horizontal lines between the bricks) and across the wall after that, go get it into vertical recesses. Movement from the top to the bottom of the wall will also give an illusion of old streaks on the brickwork. |
5. Shading
 |
| Once again using a wide flat brush, put some streaks of Army Painter Strong Tone on the wall. You may also want to add some dark shading where the cornerstones, cornices etc. are by airbrushing those places with a bit of black paint. |


niedziela, 13 września 2015
Scratchbuilt Titan Containters
I've recently posted some photos of our board in the Arkham City Limits Facebook group and as the scratchbuilt Titan containers shown in some of the pictures got interest from the members inmates of the ACL, I've decided to do a quick step-by-step here.
Sorry for the lack of pictures for the particular steps - I did those containers a few months back and didn't take the pictures back then, hopefully the description will be detailed enough to guide you through the process smoothly.
Scratchbuilt Titan Containters

Materials and Tools:
- 30mm round lipped base
- empty syringe (22-23mm diameter)
- some bits from Pegasus Hobbies Chemical Plant kit
- Gloss Mod Podge
- Tamiya 6mm masking tape
- a bit of sponge foam (e.g. from the miniature blisters)
- old brush
- modelling saw
- superglue
Paints and Painting Mediums:
- acrylic spray: brown and gray
- Vallejo Model Color: Orange Red, Marron Brown, Yellow Green, Flat Red
- Vallejo Model Air: Light Grey, White
- Vallejo Glaze Medium, Vallejo Chipping Medium
Container Body:
1. Use a modelling saw to cut off the tip of the syringe and about 5cm of the syringe tube. DON'T glue the tube to the base yet
2. Use the superglue to add the chemical container bits from the Chemical Plant kit to the titan container: you need to have access to the interior of the syringe tube, so add the 'dome' at the top of the container (where the syringe tip was) and the ring at the bottom (where you made the cut on the tube with a modelling saw).
3. Place a piece of 6mm masking tape where the container window should be, going from the top to the bottom of the container.
Basecoat and Rust:
4. With the base still off, spray paint the piece with brown acrylic spray.
5. Use a bit of blister foam to add random patches of light brown and orange where the rust should be.
6. Still using the blister foam, add the Vallejo Chipping Medium on top of those random splotches of brown and orange.
7. Cover the whole piece with grey acrylic spray.
8. Highlight with airbrush, using VMA Light Grey and VMA White.
9. Gently peel off the masking tape and rub the places where you used the Chipping Medium, so the rusty bits will show. With the body of the container built and painted, it's time to add some Titan to the piece!
Titan:
10. Mix some VMC Yellow Green with gloss Mod Podge (1:1) and some Vallejo Glaze Medium (4-5 drops). Try to smear the mix on the piece of plasticard - it should leave semi-translucent streaks of yellowish green. Add more Mod Podge or a bit of water if the streaks are too opaque for your taste.
11. Use an old brush to add the Titan mix to the inside of the containter, where the window is. Use about 3 layers, starting with just some random streaks and swirls on the whole window, and following with 2-3 thick layers at the bottom half of the container.
Basing and Final Details:
12. Glue the container to a lipped 30mm base.
13. Using a tiny brush and some VMC Flat Red, paint a scale on the side of the window and a Titan sign somewhere on the side of the whole piece. You may want to add a tiny streaks of red to the Titan sign to simulate the use of a spray paint.
The finished piece used in our BMG games:


czwartek, 3 września 2015
Batman The Animated Series Batmobile (Repaint)
You know what's hard? Explaining to your fiancée why did you order four different Batmobiles.*
You know what's much easier? Getting one of those Batmobiles to look like the one from your beloved animated series.
The Batman Automobilia collection by Eaglemoss contains some stunning models, most of them in the right scale for the Batman Miniature Game. On the other hand, those models come unpainted, so if you're planning to use them for your BMG board the lack of shading may be quite striking next to fully painted buildings and miniatures. In the case of Batman: The Animated Series Batmobile this is even more of a problem, as the shape of the model itself is much, much simpler than, for example, the two Batmobiles from Arkham video games.
I've decided to get my airbrush and get that lovely model from Eaglemoss looking a bit closer to what I knew from the Animated Series. Here's a step-by-step of what I did:
How do you like the model? Are you planning to repaint or convert some of your Eaglemoss Batmobiles too? Please let me know in the comments!
*Actually, it's not that hard; I'm making a BatCave board and as we both play BMG, she was quite enthusiastic about it.
You know what's much easier? Getting one of those Batmobiles to look like the one from your beloved animated series.
 |
| Best. Animated Series. Ever. |
The Batman Automobilia collection by Eaglemoss contains some stunning models, most of them in the right scale for the Batman Miniature Game. On the other hand, those models come unpainted, so if you're planning to use them for your BMG board the lack of shading may be quite striking next to fully painted buildings and miniatures. In the case of Batman: The Animated Series Batmobile this is even more of a problem, as the shape of the model itself is much, much simpler than, for example, the two Batmobiles from Arkham video games.
I've decided to get my airbrush and get that lovely model from Eaglemoss looking a bit closer to what I knew from the Animated Series. Here's a step-by-step of what I did:
 |
| The Batmobile freshly out of the box. |
 |
| Primed with Vallejo Grey Primer. |
 | |
| The edges were painted with VMA Intermediate Blue with some Airbrush Flow Improver and Glaze Medium added. |
 |
| This followed with a layer of VMA Signal Blue... |
 |
| ...and a mix of Signal Blue, Blue and White (1:1:1). |
 |
| Pure VMA White was then used for the most extreme highlights. |
 |
| I've used VMA Black to paint most of the body, leaving the brighter highlights only on the edges, curved piece of the hood and the front and rear lights. |
 |
| Chrome parts and the windshield were painted by hand, using a combination of wet blending and simple block highlighting. I've used some VMA Yellow mixed with VMA White (1:1) to paint the front lights. |
 |
| Finished model on the streets of Gotham. |
*Actually, it's not that hard; I'm making a BatCave board and as we both play BMG, she was quite enthusiastic about it.
wtorek, 1 września 2015
BMG in 15mm?
Before I moved on to playing BMG as it was intended to (that is, with 35mm Knight Models miniatures), I made several characters from the Batman mythos by converting several 15mm scale miniatures. Below you can see some of those minis:
 |
| Batman - gloves, boots and the mask made from ProCreate were added to a Rebel Minis superhero. |
 |
| Robin - another Rebel Minis miniature, with the right hand, Bo, mask and the cape sculpted from ProCreate |
 |
| Catwoman - Rebel Minis miniature with a collar, cat, goggles, cat's ears, belt buckle and a whip sculpted from ProCreate |
 |
| Riddler - Highlander Studios miniature with a hand from Rebel Minis miniature and a question mark and mask sculpted from ProCreate |
 |
| Two-Face - a Khurasan Miniatures mini converted by scratching the side of his face with a scalpel and turning the hand upside down with the modelling pliers |
 |
| Bane - conversion from Rebel Minis miniature. The mask and the venom pump were made from ProCreate putty. |
 |
| Joker - sculpted from scratch with BeesPutty. |
Hello!
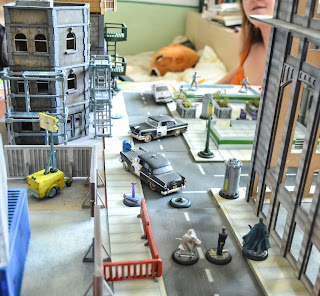
For several months now I've been playing the Batman Miniature Game by Knight Models, painting the KM miniatures and building my own little Gotham. On this blog you will find battle reports (or if you're fond of bad bat puns: BatReps), painting and terrain making tutorials and plenty of BMG-related eye candy. Below you can see some of the pictures from our recent Batman games:


Subskrybuj:
Posty (Atom)